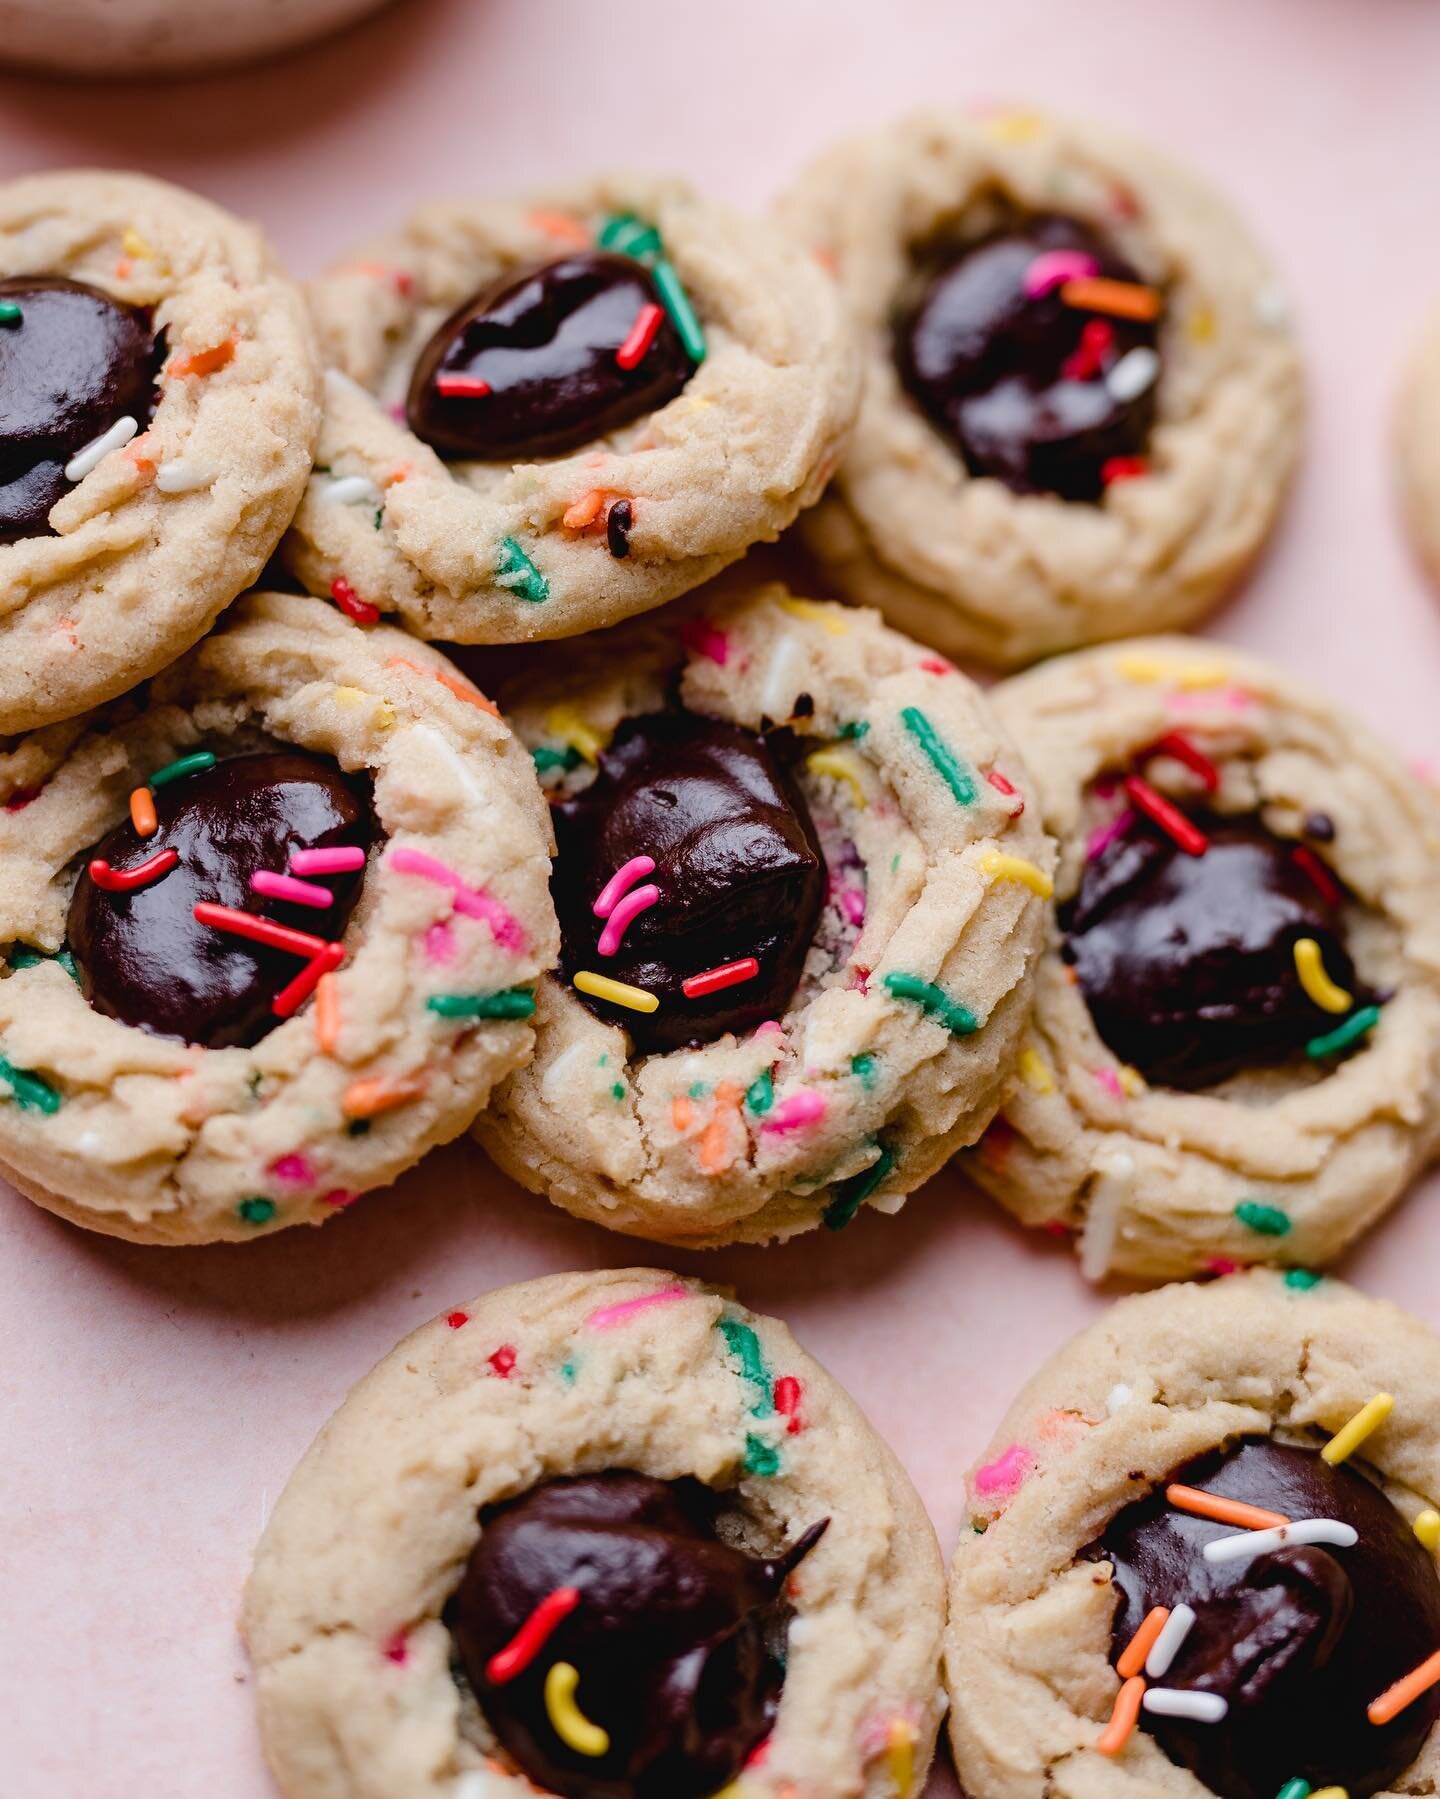
Chocolate Chip Walnut Butter Cookies
Better are all things dipped in chocolate, and these nutty, buttery, perfectly salty cookies are no exception.
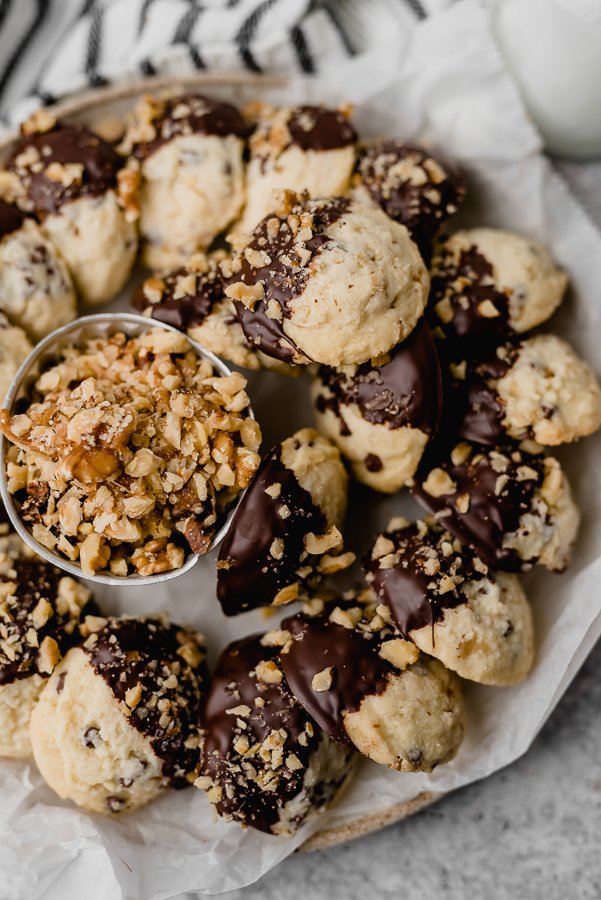
Words like, “tea time” and “dipped in chocolate”, are magical year round, especially when they also include words like, “buttery”, “nutty” and “salty”. These cookies encompass all of the above : a soft butter cookie with walnuts, mini chips, and dipped in semi sweet chocolate. I love a cookie that pairs perfectly with a cup of tea, and if that’s you too, make these cookies, as you won’t be disappointed!
These butter cookies are simple and the best part is they don’t require refrigeration before baking. Most of the ingredients are staples found at home, like all-purpose flour, powdered sugar and eggs, but a few ingredients, like mini chocolate chips and walnuts, may need to be picked up at the next grocery run, so plan accordingly. I highly recommend using mini chips, as the recipe indicates, because they spread evenly and beautifully throughout the cookie.
With that said, the steps to make these cookies are basic—cream the butter and sugars, add the single egg yolk and vanilla, and finish with the dry ingredients, chocolate and walnuts. In no time, these soft crumbly cookies will be baked and ready to enjoy, and no one will know how simple they were to create. I love when that happens! They can be enjoyed plain, but I strongly recommend dipping them in chocolate, because everything is better when dipped in chocolate.

Methods For Dipping Chocolate
I use a chocolate tempering machine to dip cookies, candies and other chocolate treats I make in the kitchen. I realize, most people don’t own a chocolate machine, so listed below are different chocolate dipping methods, with a brief description of each, including the basics of tempering chocolate.
Tempering Chocolate
What is tempering chocolate? In short, the process of tempering chocolate requires melting quality chocolate to a certain temperature, followed by adding a small amount of seed (unmelted) chocolate into the melted chocolate, “tempering” it to the correct temperature before using as needed. This process provides a professional snap, sheen and texture, found from chocolate sold in bakeries and candy shops. I personally love tackling new baking skills, and if tempering chocolate is a bucket list item, click here for a helpful Ghirardelli link, explaining two different methods in tempering chocolate.
Microwave and Stovetop with Refrigeration
For a simpler and more standard method, melt chocolate in the microwave at 15 second intervals—be careful, as chocolate can seize if heated too quickly—until melted and glossy. Once melted, dip cookies accordingly, and once finished, place dipped cookies into the fridge to help set the chocolate. Even better? Use a double boiler to melt the chocolate on the stove for even melting, and to reduce the risk of chocolate seizing. I recently purchased a double boiler, but for many years I used a stainless steel sauce pan, and placed a glass bowl snuggly inside, leaving a few inches gap between the water in the sauce sauce pan and the bottom of the glass bowl. As the water heats up to a simmer, it softly and indirectly heats up the chocolate in the glass bowl, for an even and efficient melt.
Chocolate Wafers
Lastly, chocolate melting wafers can be found at the grocery store, meant to be microwaved, dipped, and cooled quickly and efficiently (as if the chocolate was tempered), without refrigeration necessary. If learning to temper chocolate feels too daunting, but a professional look is desired, I would recommend this method, as it will give your cookies a professional touch.

Valentine’s Day Variation
Aside from being a relatively easy recipe, these butter cookies can also accommodate any holiday or season. Here is a fun Valentine’s Day variation: Chocolate Cherry Pecan Butter Cookies. To make this version, simply use the following recipe adjustments:
Instead of 1/2 cup chopped walnuts, use 1/2 cup chopped pecans.
Add 1/2 cup Maraschino or dried cherries. If using Maraschino Cherries, they MUST be dried with a paper towel before they are added to the dough. To do this, simply chop the cherries into small pieces, lay them on a paper towel, and blot with another paper, until dry. These are the Maraschino Cherries I use, which are free from artificial ingredients. If using dried cherries, they can be chopped and put directly into into the dough.
Add 1/8 teaspoon of almond extract with the 1/2 teaspoon vanilla. Cherry and almond are a delicious pairing, so it was a no brainer adding an essence of almond to the dough. The almond extract doesn’t overpower the flavors, but does add a little something extra, when enjoying the cookie.
The rest of the ingredients are exactly the same, including the 1/2 of mini chocolate chips. In the image below, I went further with the decoration, adding a pretty Valentine’s Day inspired pink drizzle. To achieve this look, simply melt a bit of white chocolate, and add a small amount of pink gel food coloring—stir to combine. Next, using a spoon, drizzle the melted chocolate over the dipped cookies—the dipped chocolate should be hardened. If the drizzle is added when the dipped cookie is still wet, it will blend together, and not look as appealing. Lastly, the cookies can be topped with chopped pecans, or even mini chocolate chips, if the white chocolate drizzle feels too complicated. Enjoy!!

Final Tip
Quality chocolate makes all the difference. When making a chocolate dessert, I always use a quality chocolate baking bar—not chips!!—for dipping cookies. Brands like Guittard, Ghirardelli and Bakers, are good choices. Chocolate chips are coated and formulated to hold their shape. This makes them unideal for dipping, but rather should be baked as they are in cookies and other desserts. Using chocolate baking bar will ensure the best results.
Lastly, wrapping these cookies in cellophane with ribbon, or placing them in a cookie tin, makes the perfect gift!
Chocolate Chip Walnut Butter Cookies

Ingredients
- 1 cup salted butter
- 1 cup powdered sugar
- 1 egg yolk, room temperature
- 1/2 tsp vanilla
- 2 cups all purpose flour
- 1/4 tsp salt
- 1/2 tsp baking powder
- 1/2 cup mini chocolate chips
- 1/2 cup walnuts, chopped
- 12 oz semi-sweet or dark chocolate, coarsely chopped
- 1/4 cup walnuts, chopped small
Instructions
- Preheat oven 350 degrees F. Line two cookie trays with silicon mats or parchment paper. Set aside.
- Using a mixer fitted with the paddle attachment, cream together the butter and sugars until combined, medium speed for about 30 seconds.
- Add the egg yolk and vanilla and mix on medium-low speed until combined. About 10 seconds.
- In a separate bowl, combine the flour, salt, and baking powder. Stir to combine. With the mixer on low speed, add the dry ingredients into the wet ingredients and mix until just combined.
- Add the mini chocolate chips and walnuts into the mixer mix on low speed and briefly combine until evenly distributed.
- Scoop 2 tablespoon size balls onto prepared trays a few inches apart. Using a half cookie sheet, 12 balls per should fit per tray.
- Place cookie sheets in oven and bake for 6 minutes. Rotate trays and bake another 6-8 minutes. Watch the cookies carefully after rotatin, as every oven is different. When the cookies are lightly golden brown, with a richer golden ring around the edges, remove from oven and let cool for a few minutes before transferring to a wire rack.
- Line one half sheet baking tray with parchment paper.
- Using a double boiler, melt chocolate until just smooth. Once the cookies are completely cooled, dip each cookie half way in chocolate, shaking off excess before placing cookies on prepared tray. Continue dipping each cookie, sprinkling a few chopped walnuts on top after each dip.
- Once cookies are dipped, place tray in the refrigerator to help the chocolate set.
- PLEASE NOTE: In the introductory text of this blog post, other chocolate dipping methods are discussed, including tempering chocolate and using specified chocolate wafers.
You May Like These…