Guinness Chocolate Cake with Baileys Cream Cheese Icing
Rich, warm, chocolatey, and with a tender crumb, this Guinness treat is the perfect alternative to traditional chocolate cake.

As I gear up to write up this blog post, I can’t help but sigh. I miss traveling, and subsequently, Guinness cake reminds me of Ireland. COVID-19 has certainly stunted certain trips, and although I haven’t travelled the world, I have been to Ireland and Canada, and would recommend both with zero hesitation. Both countries are gorgeous, especially Ireland, but even more appealing is the kindness of the people. For the Irish, perhaps we can blame their kindness on their comforting food and drink—it warms the soul. This Chocolate Guinness Cake intends to do just that.
What can be expected from this cake? It’s flavorful, with a whole cup of Guinness, and it has a warmth in taste, that doesn’t overwhelm the chocolate. The Baileys cream cheese icing is smooth, creamy and not too sweet—with a boozy kick of course! The texture is rich, moist and boasts a fudge like texture, and because there is a larger liquid to flour ratio—it’s reminiscent of a mud pie consistency, that is oh. so. yummy!
This cake is easy to make, and in following a few guidelines, a perfect cake can be produced. Tips and tricks are as follows.

All Purpose vs. Cake Flour
I’m frequently asked, “why use both cake and all-purpose flour in your recipes?” It’s true, in most of my cake recipes, I use a combination of both flours. I landed on this technique after a lot, and I mean a lot of cake testing. When testing with just cake flour, it wasn’t right, often yielding a cake crumb that was too light, and the texture didn’t allow for that tender, yet substantial bite we all crave when eating a decadent slice of cake. Similarly, using just all-purpose flour wasn’t a perfect fit, often yielding a heavy crumb that was reminiscent of a bread or a muffin. Using both flours creates a cake that is light, tender, moist, but with enough bite that it feels satisfying—aka the perfect slice of cake.
I’ve been asked, “is cake flour hard to find?” No, I purchase my cake flour from Nob Hill or Safeway in the baking isle next to the flour—it often comes in a small box. Since my cake recipes usually split the two flours, a small box lasts for many bakes. It is truly my advice, that if you enjoy my recipes, use both flours as recommended. It does make a difference, and in case you’re wondering, most bakeries use cake flour for their cakes! I will be honest, that although my recipes are relatively easy and attainable, my goal isn’t simplicity, it’s to provide recipes as good as a bakery.

Properly Measuring Flour
Many seasoned bakers recommend weighing ingredients for optimal accuracy—this isn’t bad advice. I do have a scale, and for macarons, and other delicate pastries, I do weigh ingredients. But for cake, I find spoon and leveling the flour a sufficient technique, for the most part. Simply, fluff the flour gently, and using a spoon, spoon the flour into the measuring cup, and once it’s domed over the measuring cup, simply scrape away the excess flour with a knife, back into the bulk flour. Why is this important? Too much flour is a nasty culprit of many baked goods going awry, creating heavy, dense and dry bakes. Measuring the flour correctly provides a whole new world of baking—yielding light desserts that are delicate and delicious.
Final Tip
Once pulled from the oven, the two cake layers may slightly sink while cooling, and that is okay. After googling Guinness cake on the internet, I found most recipes use sour cream, and while I love baking with sour cream, I typically recommend this ingredient for coffee cake, muffins and pancakes, not for a light fluffy cake. After lots of testing and trusting my gut, creating a non-traditional recipe was the right call. But because of these tasty adjustments, and the liquid to flour ratio, there is less gluten, meaning the cake could slightly sink when pulled from the oven. But don’t fear! This is easily covered up with icing, and the lucky individual enjoying the cake will be none the wiser.
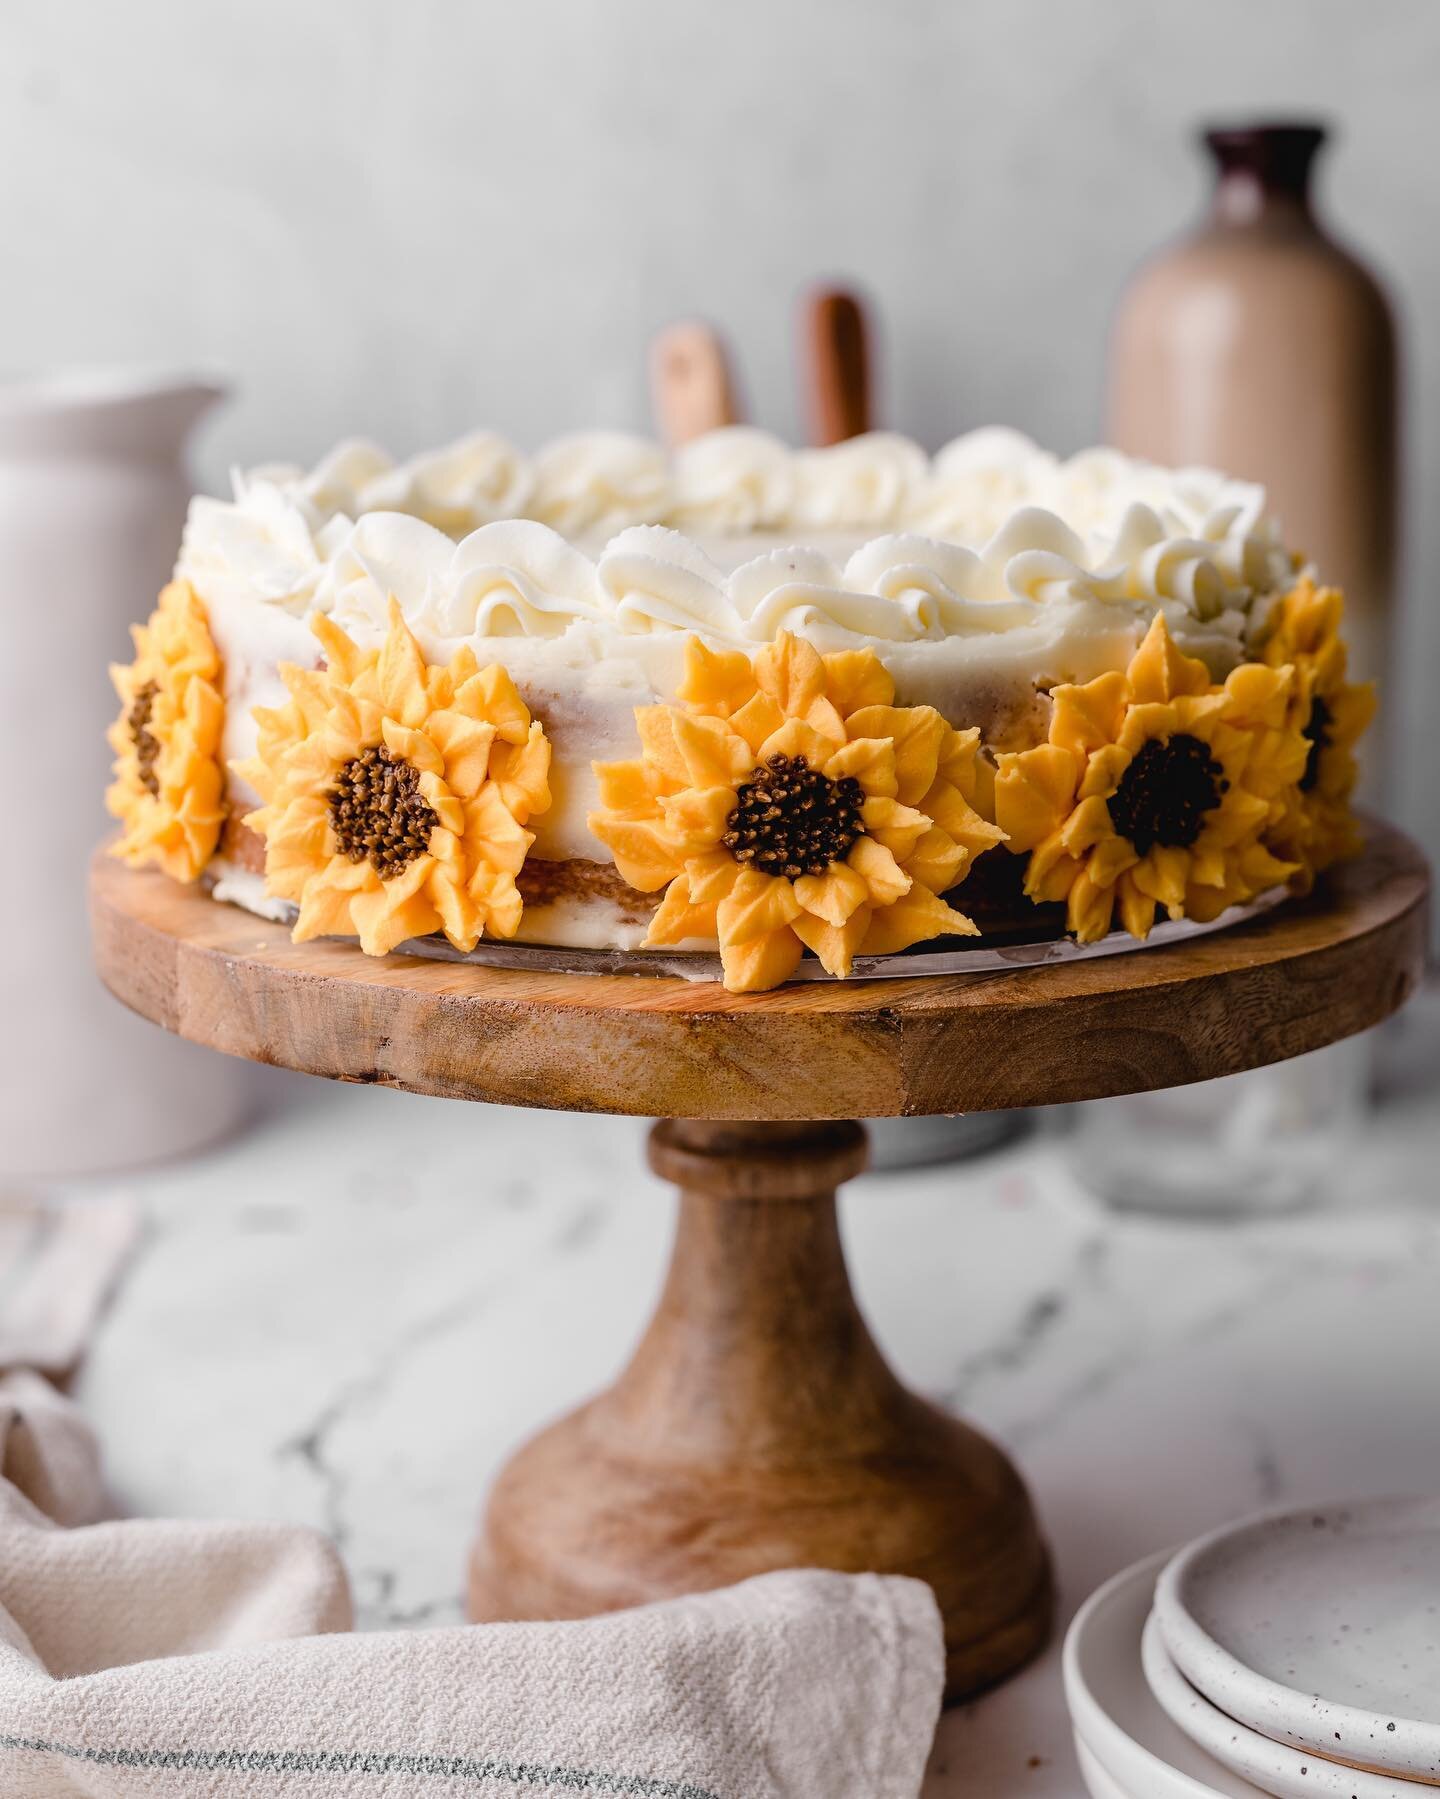
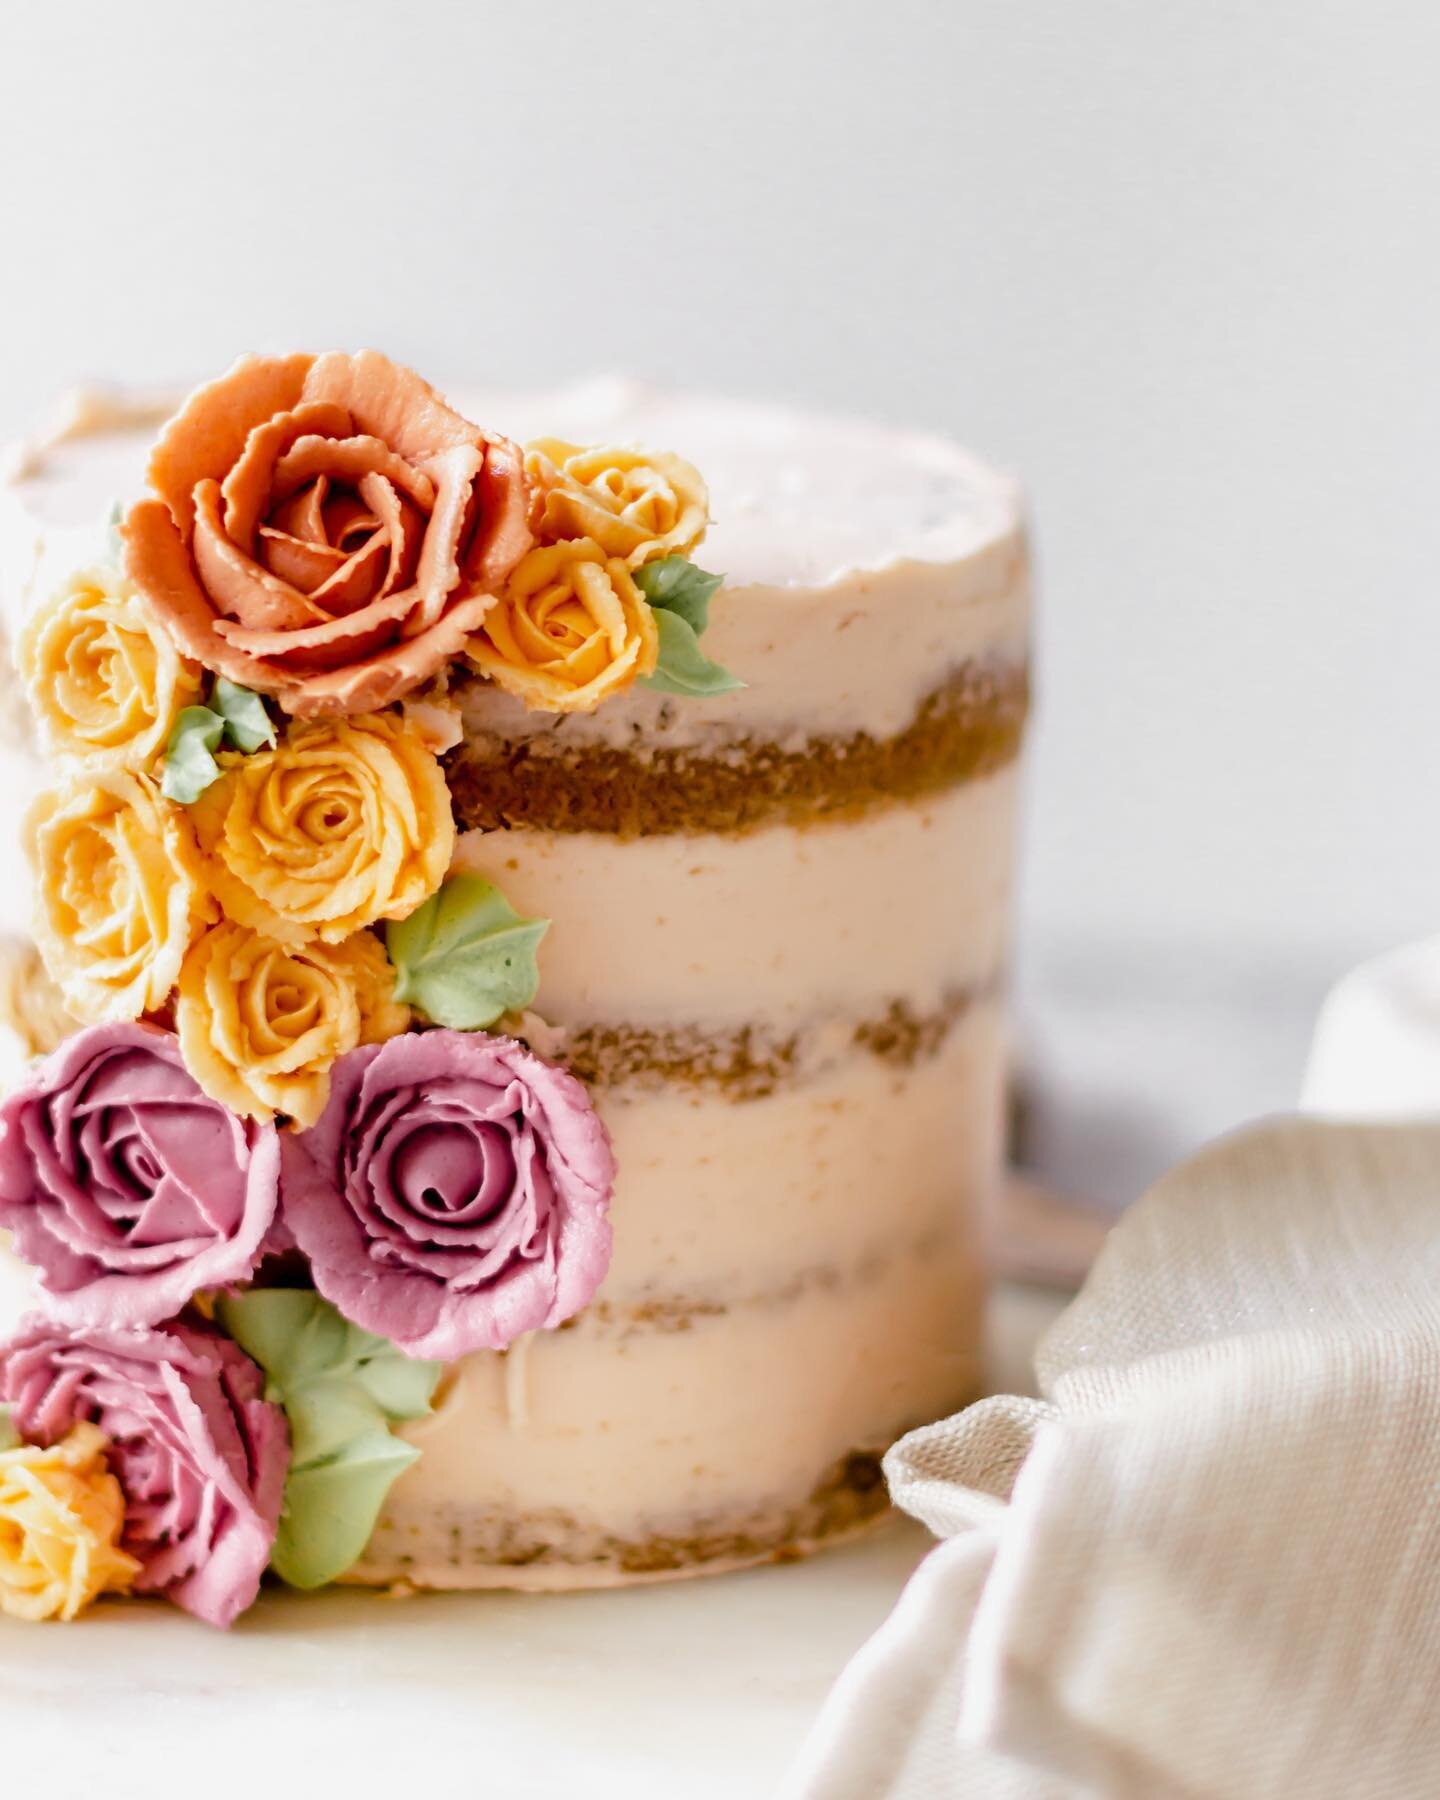
Lastly, as pictured, this cake is meant to be decorated with a rustic design—typically a semi naked cake. To achieve this look, once the cake is baked and cooled, carefully wrap the two layers in saran wrap, and place the into the fridge to cool—typically one hour. Once cooled, layer the cakes—cake, icing, cake, remaining icing. Bring the icing to the sides of the cake after smoothing it over the top. Using a back and forth motion, cover the cake with remaining icing. Once the cake is properly covered, using a bench scraper (also known as cake smoother), with your dominant hand, hold the scraper steady against the cake at a slight angle, and slowly move the turn table with the other hand, not moving the scraper, and keeping it as straight and steady as possible. As excess icing builds on the scraper, place it back into the mixing bowl, and continue smoothing the cake with a clean scraper. Because I intended this cake to be semi naked, I don’t require a crumb coat, but instead, I scrape away the icing, revealing a bit of the crumb underneath. See pictures for reference. This technique is called a semi naked cake.
This cake freezes well. If the cake isn’t intended to be decorated the same day it’s made, simply wrap the layers in plastic wrap, followed by tin foil. Place in the freezer until ready to use. No need to thaw the cake, simply decorate frozen, and then allow to sit out—decorated—for three hours before serving.
The best part? There is no wrong way to decorate a cake, so have fun and enjoy every bite, as i’m confident you will.

Guinness Chocolate Cake
Ingredients
- 1 1/2 sticks salted butter, room temperature
- 2 cups granulated sugar
- 2 tablespoons canola oil
- 3 large eggs, room temperature
- 1 tablespoon vanilla
- 1 1/4 cup + 2 tablespoons all purpose flour
- 1/4 cup + 2 tablespoons cake flour
- 1 1/2 teaspoon baking soda
- 1/2 teaspoon salt
- 1/2 cup half-and-half
- 1 cup Guinness beer
- 2/3 cup unsweetened cocoa powder
- 8 ounce block cream cheese, room temperature
- 1 stick salted butter, room temperature
- 3-4 cups sifted powdered sugar depending on desired consistency and sweetness
- 1 1/2 tablespoon Baileys Irish Cream liqueur
Instructions
- Preheat oven 350 degrees F. Butter and flour two 9" cake pans. Set aside. Using a small saucepan, heat Guinness on low heat leaving beer to warm while preparing the batter.
- In a mixer, fitted with the paddle attachment, cream the butter and sugar on medium-high speed for 4 minutes. Drizzle the oil into the bowl on medium speed. Once incorporated, turn the mixer back to medium-high speed for another 1-2 minutes.
- Add eggs one at a time, briefly mixing batter on medium-low speed until smooth and scraping the bowl after each egg addition. Add vanilla and briefly mix until combined.
- In a separate bowl, using a fine mesh sieve, sift the flours, baking soda and salt. Spoon and level the flours for an accurate measurement.
- Add measured half-and-half and cocoa powder into a glass measuring cup and whisk until the mixture is a smooth thick paste. It will likely collect into the center of the whisk. This is okay because it will be loosened by the beer in the next step.
- Remove Guinness from heat, at about 140-150 degrees F. The beer should be hot, but not simmering or boiling. Slowly pour the hot Guinness over the cocoa and half-and-half paste and gently whisk the three ingredients together. Once the beer is incorporated, gently knock out any remaining clumps from the whisk and give the mixture a final stir. The mixture does not need to be perfectly smooth and may have a few clumps.
- Alternating between the dry ingredients and the beer mixture, add a third of the flour mixture into the mixing bowl on low speed. Immediately follow with half of the beer mixture, followed by another third of the flour mixture and the second half of the beer mixture. Finish with the remaining flour mixture. The mixer should be kept on low speed, so the flour and beer mixture do not splash out of the bowl. Scrape the bowl, making sure any dry ingredients trapped at the bottom are brought to the top. After scraping, turn the mixer up to medium for just a few seconds ensuring the batter is fully mixed and smooth.
- Pour batter evenly into the prepared pans and place into oven. Start assessing your cakes at 20 minutes. They could take up to 25 minutes or more to cook depending on your oven's temperature. When a toothpick inserted comes out clean, the cake is done. Cool pans for 10 minutes before running a knife around the edge of the pan, and turning out the cake. Place cake on wire rack to finish cooling. Once cake is cooled, cover with saran wrap and refrigerate for one hour. This last step is optional, but makes icing the cake easier.
- With an electric mixer fitted with the paddle attachment, mix the cream cheese and butter on medium speed until there are no lumps and the consistency is smooth.
- Add sifted powdered sugar to the bowl, one cup at a time, mixing first on low speed to prevent splashing, then turning the mixer to medium-high speed for 30 seconds. Repeat process with remaining two cups of powdered sugar. Add Baileys and mix on medium speed for a few more seconds. Give the mixing bowl a good scrape and briefly mix one more time to complete the icing.
- Place a small dollop of icing on a clean turntable or cake board. Next, place the bottom layer of cake on top of the icing. This works as a glue, helping prevent the cake layers from sliding around. Place a large dollop of icing on top of the first cake layer, and spread evenly with a small offset spatula or knife. Place the second cake layer on top of icing. Place another large dollop of icing onto the cake, smoothing the top evenly and letting excess icing drop to the side of the cake.
- With the rest of the icing, using an offset spatula, put a layer of icing around the entire cake, working in a back and forth motion. Using a bench scraper (also known as cake smoother) with your dominant hand, hold it steady against the cake slightly angled toward the cake to aid in smoothing. Slowly move the turntable with the other hand, while keeping the bench scraper as straight and steady as possible. As excess icing builds on the scraper, wipe it back into the mixing bowl, and continue smoothing the cake with a clean scraper. This cake is intended to be semi-naked, so as the excess icing is scraped off the cake, bits of the cake underneath will be exposed. See blog pictures for reference.
- While smoothing the sides, a lip of icing will form around the top of the cake. Using an offset spatula, gently sweep away the lip with a motion toward the center of the cake. Rotate the cake and sweep until the lip has been removed and top of the cake is smooth. Any leftover icing can be used to additionally decorate the cake with a beaded boarder, or another decoration of choice. Store cake in the refrigerator until 2 hours before serving.
You May Like These…